
 English
 Deutsch
Edit images right in the CMS
As of CMS version 9.1.9, images can be edited manually in the back end. You rotate photos, brighten or darken them and set the crop area, including for the automatically generated thumbnails – no external image editor required.
Anyone who maintains content knows the situation: the product photo is a touch too dark, a photo is sideways, and the square thumbnail cuts off the one thing that matters – the head. Until now, that meant every time: download the image, open it in an image editor, fix it, save it, upload it again. With the built-in Image editing, you do this in a few seconds right in the back end.
Editing the original file
In the detail view of a record, expand “File details” below an image and choose “ Image editing”.
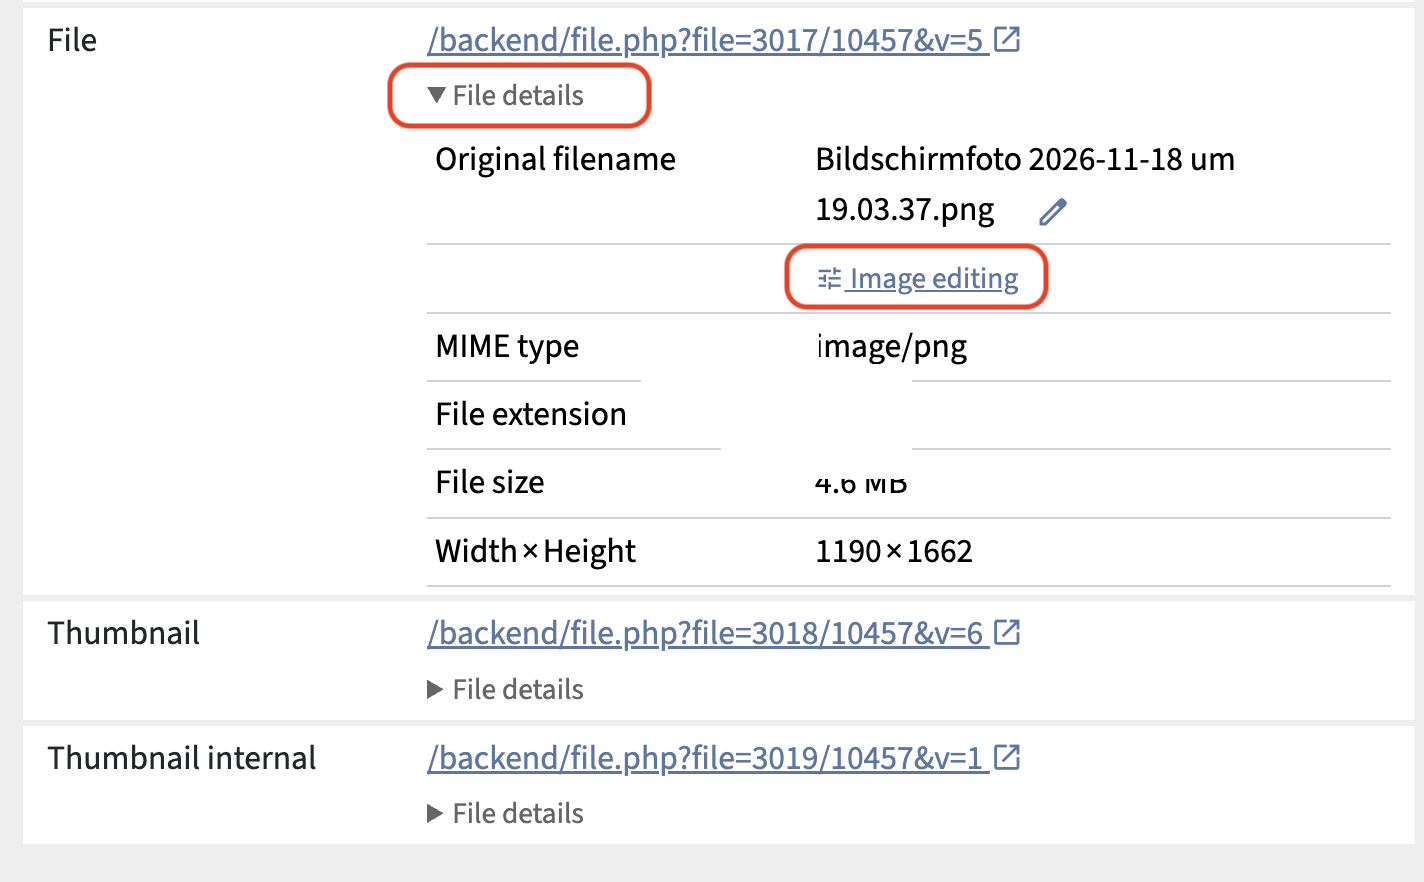
A view of its own opens with the image and a slim toolbar:
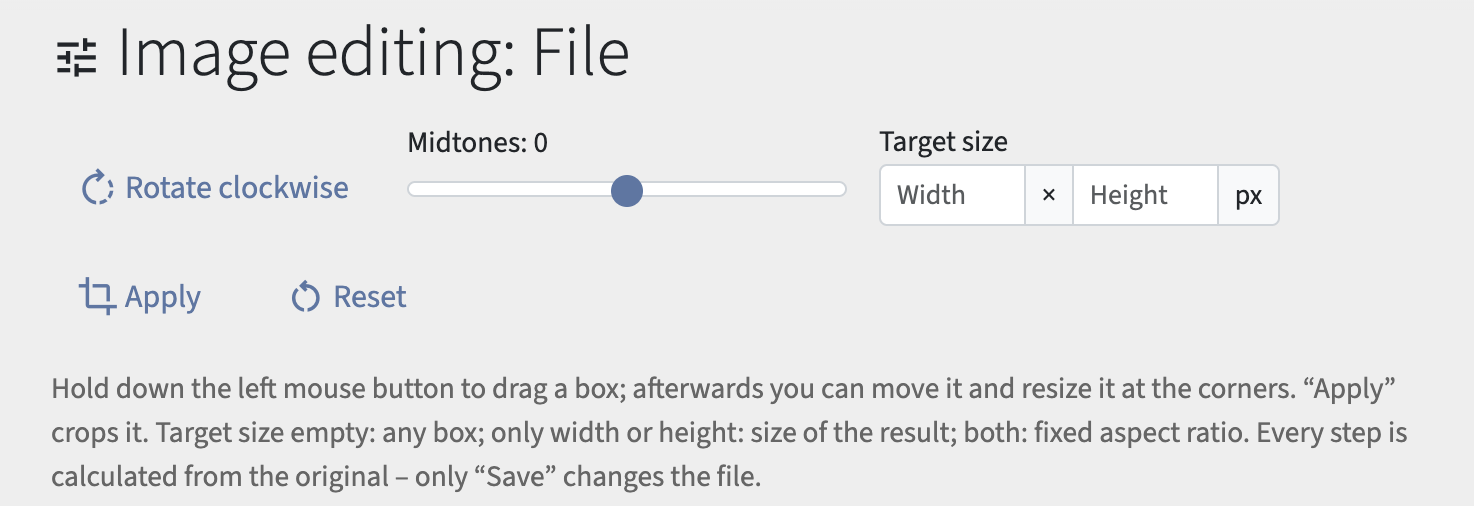
- Rotate: “Rotate clockwise” turns the image in steps of 90°.
- Midtones: A slider brightens or darkens the image. It only shifts the medium tones – highlights and shadows are preserved, so the image does not look washed out and nothing “blows out”. For the typical interior shots that are too dark, or for backlit photos, this is exactly the correction you used to have to open an image editor for.
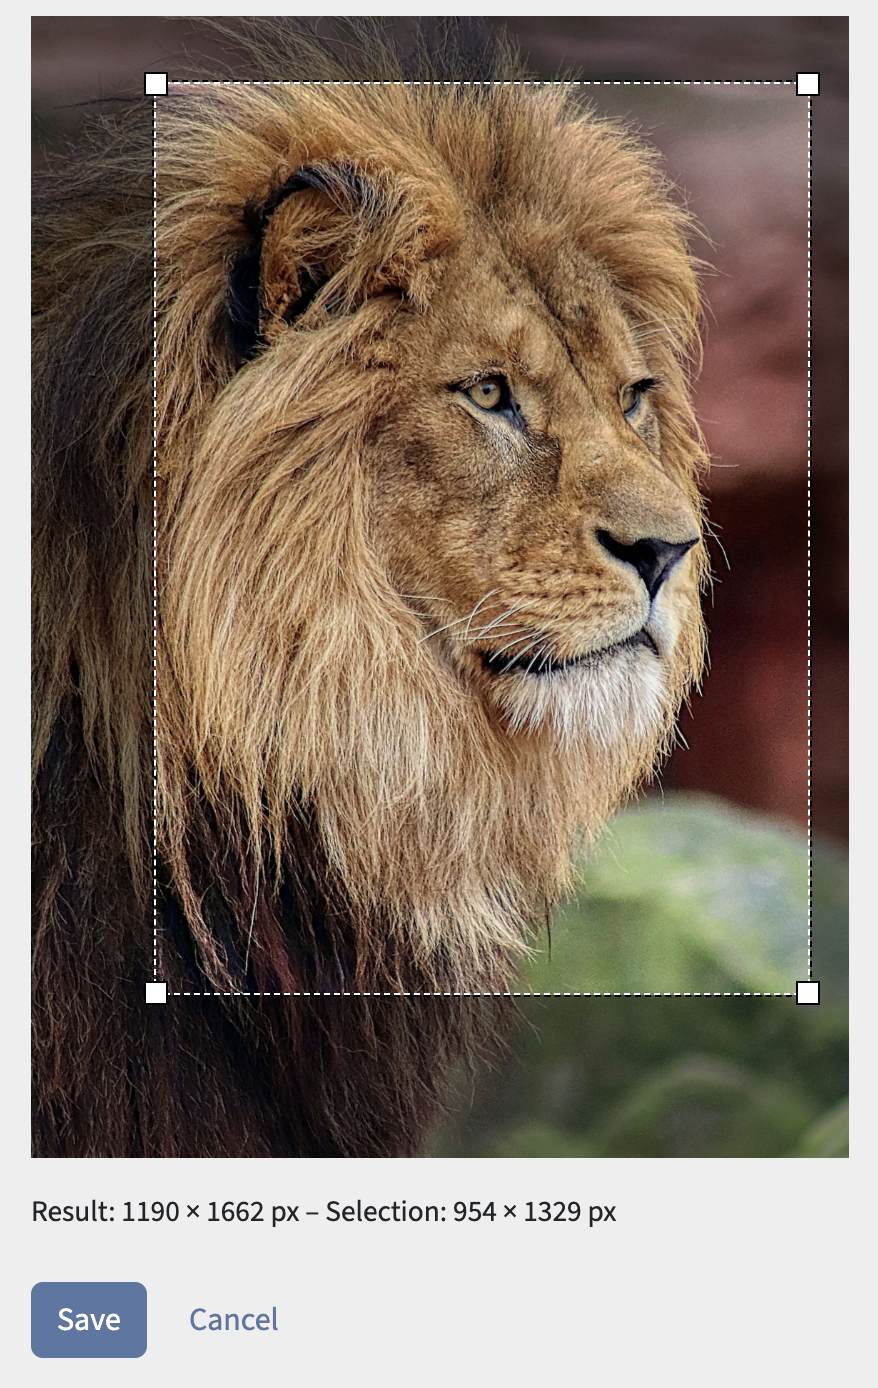
- Crop: Hold down the mouse button to drag a box, move it and resize it at the corners. “Apply” crops it.
For cropping, you can enter a Target size – just as you know it from the crop tool of an image editor:
| Target size | Result |
|---|---|
| empty | free box, the image keeps the size of the crop area |
| only width or only height | free box, the result is brought to this width or height |
| width and height | the box has this aspect ratio, the result exactly this size |
An example: you enter 1200 × 630 pixels and get a matching teaser or social media image with a single box.
Below the image you can always see how large the result will be and how large your selection is.
No loss of quality
Every step is calculated from the original – even if you rotate several times, readjust the brightness or later reduce a crop area, the quality does not suffer. The file only changes when you click “Save”; “Cancel” leaves everything as it was.
camindo CMS keeps the original. If you open the image editing again later, you see your settings and can change them. With “Reset” and “Save” you can return to the unchanged original at any time. Only when you upload a new file does the editing start from scratch.
When saving, camindo CMS regenerates all thumbnails – they show the corrected image right away.
The right crop area for every thumbnail
From an uploaded image, camindo CMS automatically generates further versions, such as a square thumbnail for lists or a landscape teaser image. Until now, the center of the image was always used. That often fits – but not always: with a portrait-format headshot, the crop lands on the upper body instead of the face; with a product photo with lots of background, only half of the product is visible.
Now you decide on the crop area yourself. For thumbnails, the file details offer “Set crop area”. The box already has the right aspect ratio; you simply move it to where the important part of the image is, and save. “Automatic (centered)” returns to the center of the image.
This also works for thumbnails for which only a width or only a height is set. In that case the box keeps the aspect ratio of the original, and you choose an enlarged section – such as a detail of a product or one person from a group photo – which is output just as wide or as high as the whole image was before.
The crop area is kept: when the thumbnails are generated again – for example after editing the original image or after changing the converter settings –, camindo CMS applies it again. Each thumbnail has its own crop area: the square shows the face, the wide teaser image the whole scene.
Safe in a team
While the image editing is open, the record is locked for others – just as with the input form. Nobody accidentally overwrites your work, and conversely you see who is currently editing a record. “Save” or “Cancel” releases the record again.
Image editing is available to all users with write permission for the area. The preview during editing cannot be reached from outside – only the saved result appears on the website.
Requirements
Image editing uses ImageMagick on the server; once the processor is set up, the features are available without any further configuration. JPEG, PNG, WebP, TIFF, BMP and AVIF can be edited. “Set crop area” appears for thumbnails that an ImageMagick converter generates with a fixed target width, target height or both.
More on this in the editors' manual, chapter “Editing records”, section “Editing images”.